
Aitum Vertical Plugin for OBS 29+


Introducing Aitum’s Vertical Plugin for OBS – the fast and easy new way to make vertical content and ready to tackle multi-platform streaming.
There are so many reasons to use a vertical setup like Aitum Vertical Plugin for OBS! Think about it – live multi-streaming to multiple platforms, or even posting potentially viral clips to Instagram, TikTok, YouTube Shorts!
All of these are wonderful tools when it comes to sharing highlights and clips from your stream and creating growth.
Before Vertical Plugin for OBS
Before the Vertical Plugin for OBS, there were a variety of problems when it came to multi-streaming or making vertical clip content.
- It’s a lot of work. To sit down and individually edit down streams and clips, all while completely changing your format from a traditional horizontal video into your vertical clip – that can take a significant amount of time that most content creators don’t have.
- There is significant strain on your PC pre-Vertical, because you have to run multiple instances of OBS to stream and record in two different formats.
What’s a creator to do? Use the Vertical plugin for OBS!
All About Aitum’s Vertical Plugin for OBS 29+
Vertical is a standalone plugin for OBS Studio version 29 and newer. It’s been built by the folks who brought us Aitum – an automation system for streaming. This plugin creates a second canvas and scene set formatted for Portrait oriented videos, such as those found in Instagram, TikTok, and YouTube Shorts.
This plugin is a must-have for streamers who are looking to multi-stream to different platforms, as well as those trying to repurpose content to promote stream growth.
Here’s a deep dive on how to download, install, and use Vertical by Aitum.
Step One: Download Vertical
Vertical is available for Windows, Linux, and Mac. I’ll be showing the Windows side of things, since that’s what I run, but the steps for Mac are very similar, if not identical.
The Linux plug-in is installed via flatpak, and requires that you have OBS installed through flatpak as well. For more information, you can click here for the OBS install instructions, and here for the plug-in install.
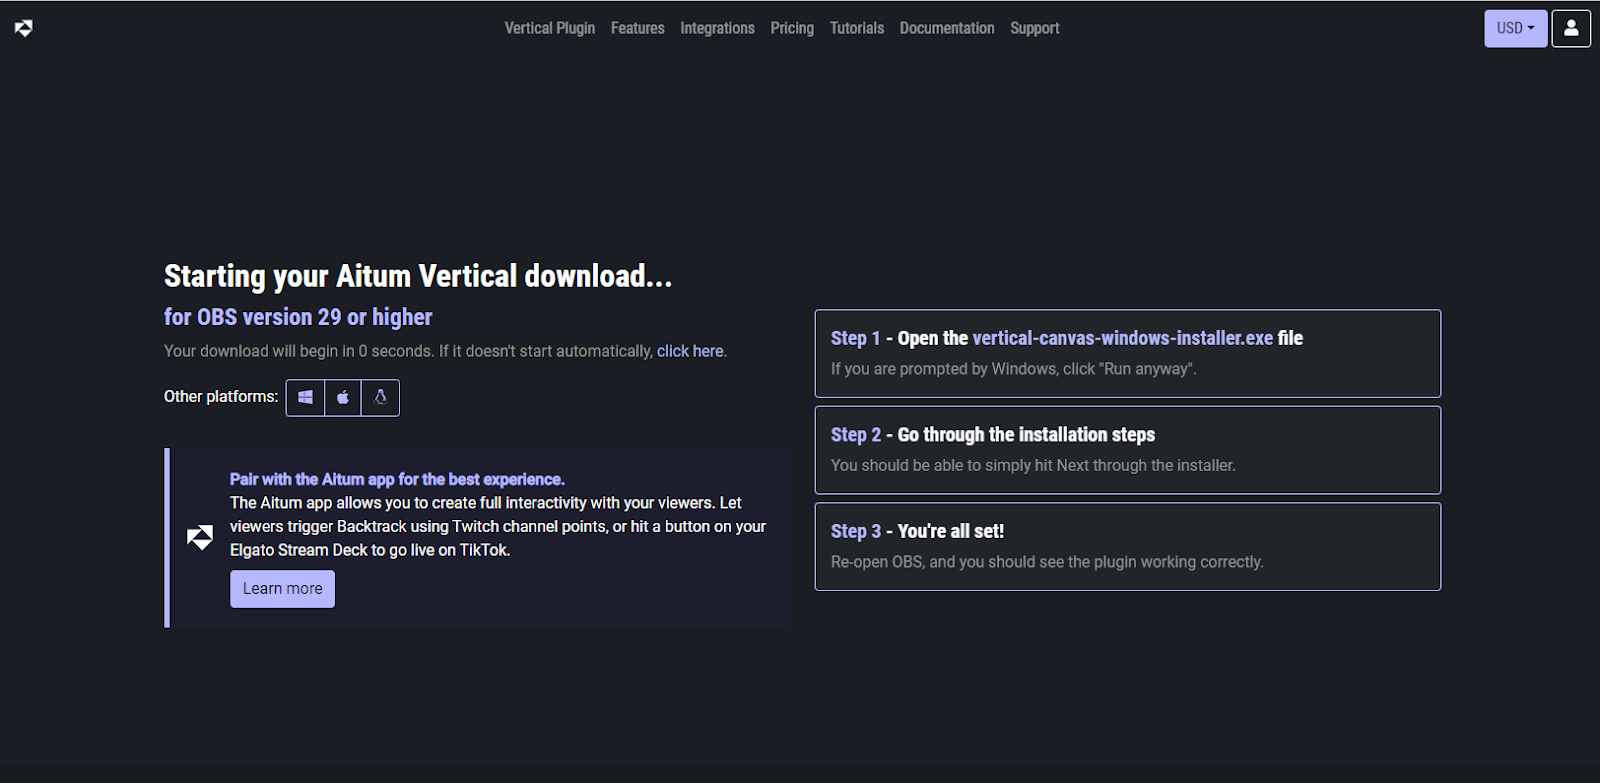
Aitum’s Vertical downloader is meant to start automatically and is compatible with OBS version 29 or higher.
The downloader for your specific OS should start automatically.
Step 2: Run the Installer & Fully Install the Plugin
Make sure to click “Yes” if a pop up comes up asking if you want to allow this program to make changes to your computer.

The installer will take you through several options, including the installation path and the option to create a startup shortcut.
The installer may prompt you to pick an installation path for the plugin. It is recommended to install the plugin under the same folder as your OBS Studio program.
If the installer prompts you to create a startup shortcut, that this is not required and is completely optional up to the preference of the user.
Click “Install” and let the installer work its magic. Click “Finish” when the installation is complete.
Step 3: Reopen OBS & Explore
I’m showing OBS here from a clean install with Vertical running.
You should notice that there are a few new locations in your dock, as well as an entirely new vertical canvas to use for streaming and recording!
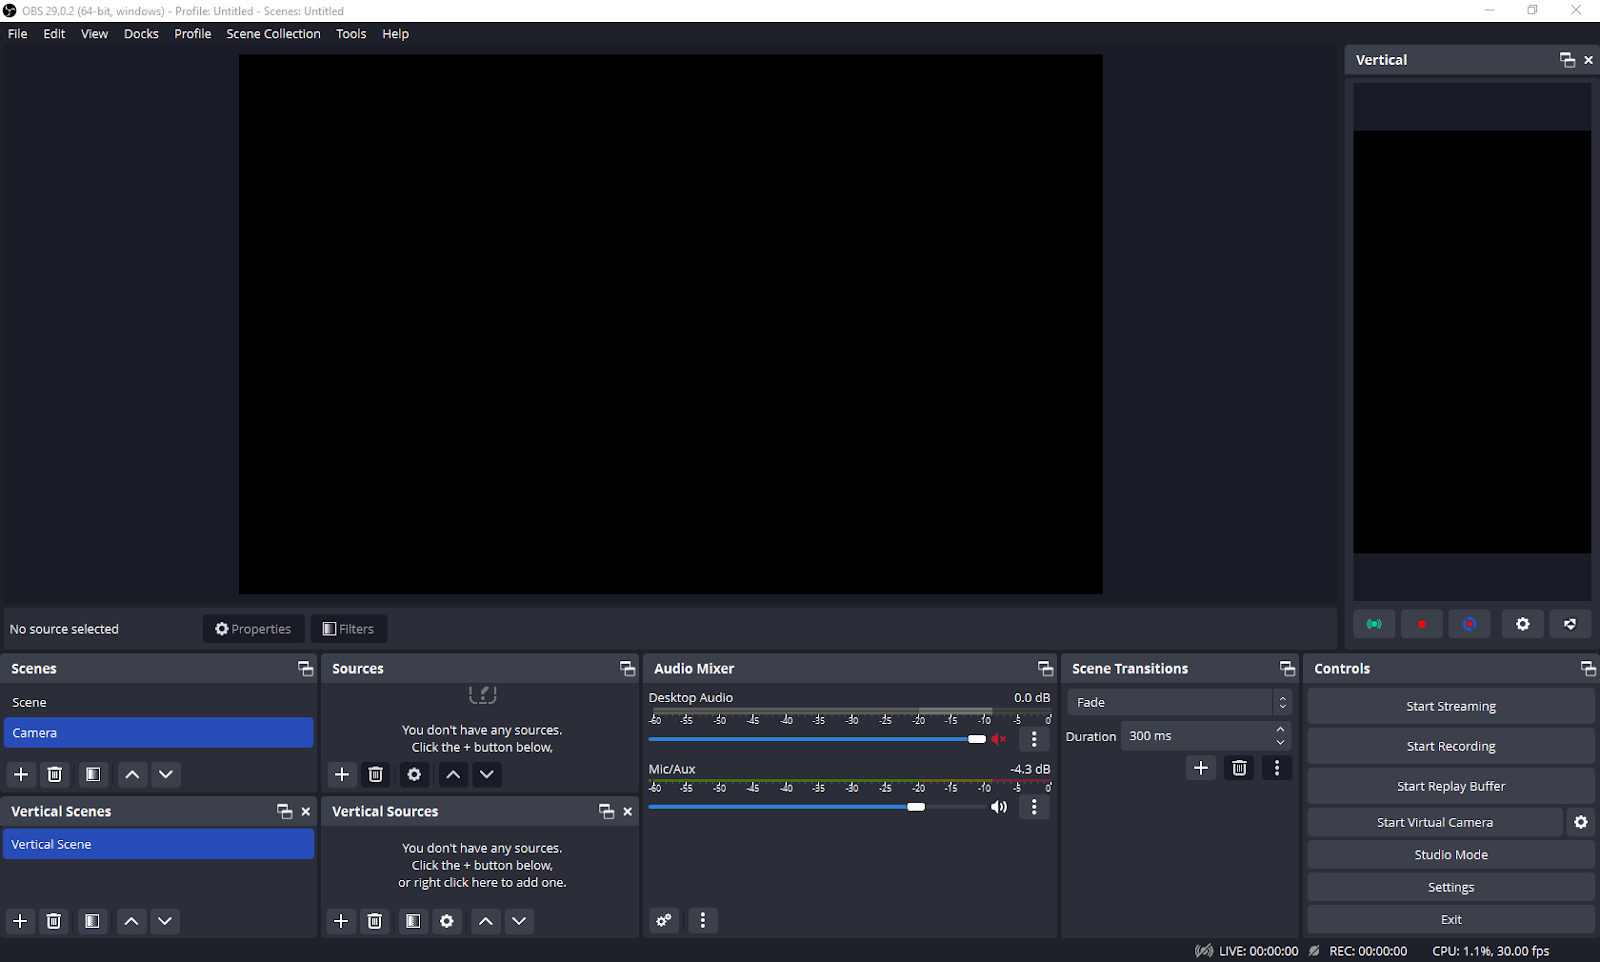
The above shows the new OBS layout after opening the program with the Vertical plugin installed correctly.
Layout for Vertical Plugin for OBS
Let’s take a deeper look into what each of these menus are. First, let’s look at our canvas. You can see here that we now have two different canvases to play with, one in our standard landscape orientation, and one in a portrait orientation.

When you first fire up OBS with Aitum Vertical Plugin, the Vertical canvas will be docked to the right. You can move this wherever you wish, even have it as a separate window if necessary.
Starting with the top half of the screen, you can see the normal OBS canvas on the left, while the new vertical canvas is to the right, with it’s own menu bar below.

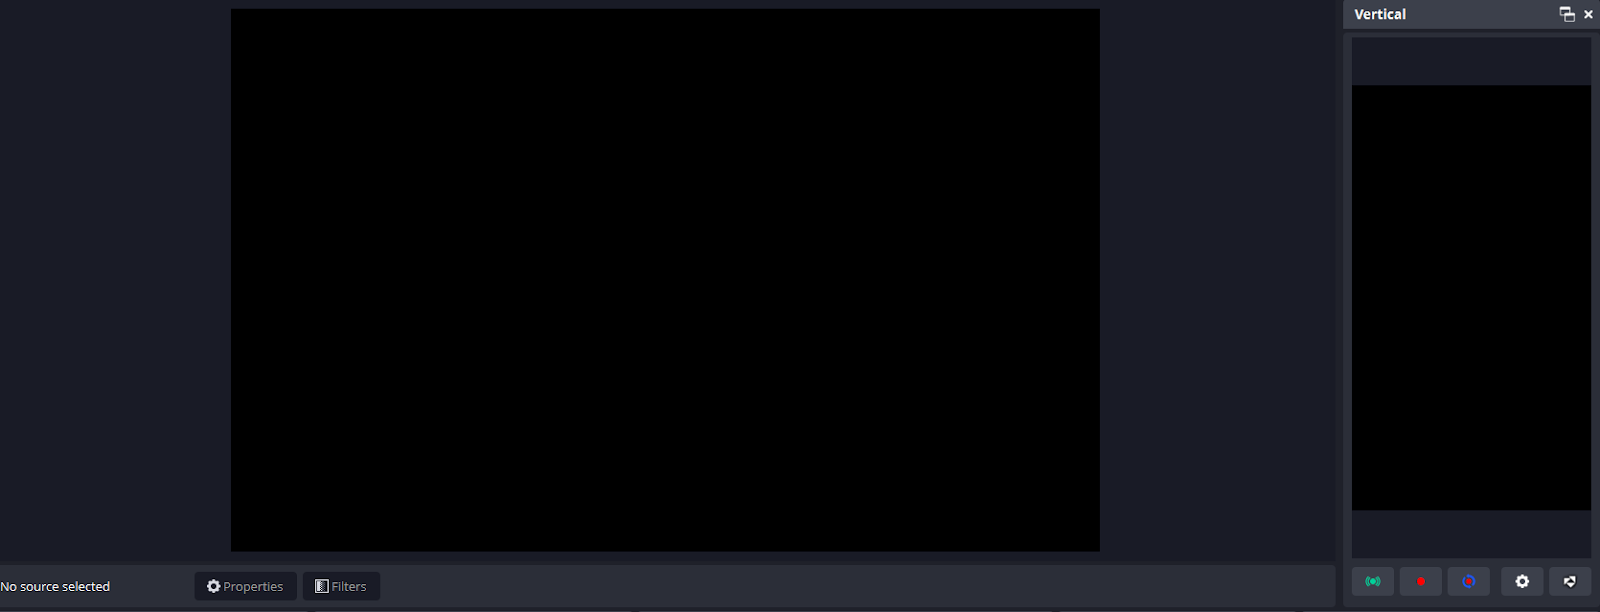
Buttons 1 to 5, starting from the left.
At the bottom of the Vertical canvas, there are a series of buttons. Let’s go over them from right to left together.
- Your first button on the left is the Stream Vertical button, which will allow you to stream to Instagram and TikTok with ease.
- The next button is the Record button for vertical content, allowing you to record your content in Portrait orientation so you can edit clips and share on the platform of your choice.
- Next up is the Backtrack Record feature, which provides an instant replay of sorts to make your clip editing a bit easier.
- Fourth button is your Vertical settings.
- This final button is a link to Aitum’s website.
At the bottom of the window, we have our scenes and sources. The Vertical sections for scenes and sources are kept separate from normal scenes/sources in their own menus, which you can move to a different position in docking if you wish.
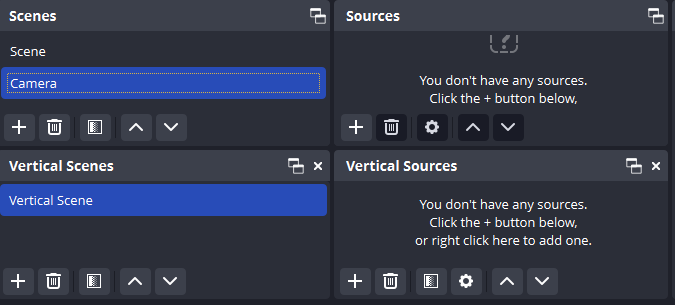
In the bottom right of the main OBS screen after installing Aitum’s Vertical Plugin for OBS 29+, there will be a section to show your scenes and sources for Vertical content.
Settings for Vertical Plugin for OBS
Now that we know what we are looking at, let’s look at the settings menu for the Vertical plug in. If you click on the cog as noted above, it brings up the settings specific to Vertical.
The Settings cog is the second button from the right, as seen on the bar above.
The settings cog will bring you to a Settings Menu where you have access to several tabs to control your overall experience – General, Streaming, and Recording.
Here there are three different tabs: General, Streaming, and Recording. Let’s take a look at your customization options in each tab!
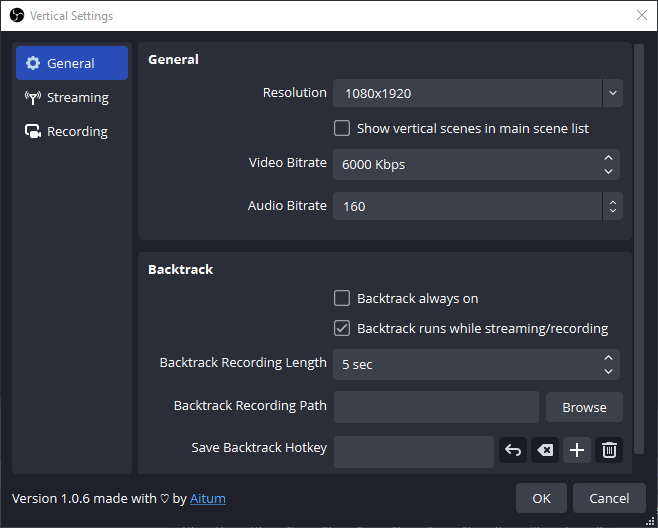
General Tab
Here we can adjust resolution – this will usually be some form of 9:16 resolution, like 1080×1920. There are also options to show vertical scenes in the main scene list. You can also adjust your video and audio bitrate for the vertical canvas here.


MirvansMusings
he/him
Mirvan is a writer for SolarStream. Father of 3 by day, variety & charity streamer by night, Mirvan is a man of simple tastes.
I personally keep the option ‘Show vertical scenes in main scene list,’ turned off. However, use the configuration that works best for you.
Also in the General tab, we have the Backtrack settings. Backtrack is an instant replay of sorts. It will go back however many seconds you set it to and record everything up to the point you activated Backtrack.
If you want to use Backtrack, I recommend going into the normal OBS settings, clicking on the “Output” tab, and making sure you have your Replay Buffer set to the time frame you want Backtrack to record, and make sure the Backtrack Recording Length matches in Vertical’s settings.
You can also set up a recording path and a hotkey for using Backtrack here.
Streaming Tab
This tab for Vertical settings is very similar to what you see in the normal OBS settings menu. You choose the server you want to stream to, provide your key, and set any hotkeys you may want.
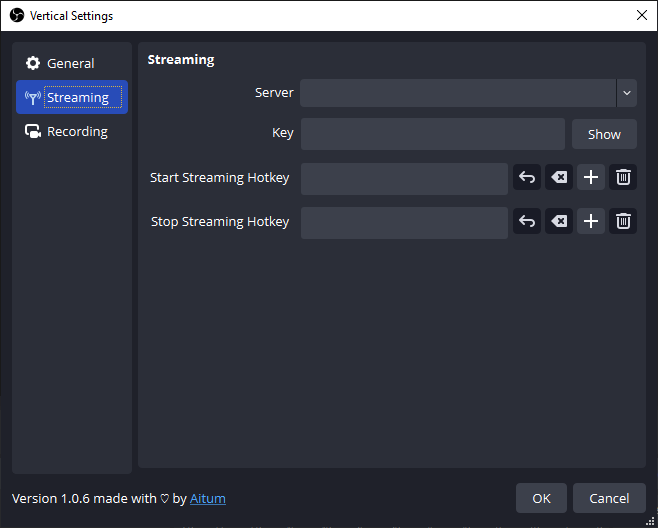
The Streaming Tabs is where you put details to the server or platform you wish to stream to.
Recording Tab
Specifically this is the tab that allows you to set the folder you want to save your recordings to and set the hotkeys for recording. Best part is, any hotkeys you set for Vertical can match the hotkeys you have set for streaming or recording videos normally.
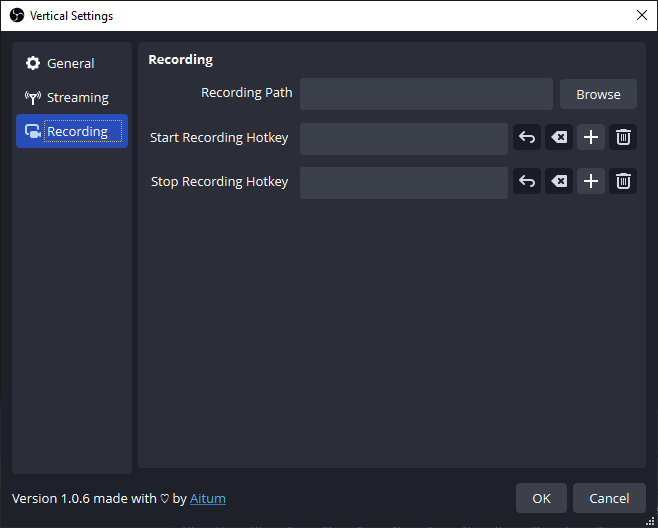
The Recording Tab allows you to customize your recording path for new content, as well as utilize hotkeys for different recording functions.
MirvansMusings
he/him
Mirvan is a writer for SolarStream. Father of 3 by day, variety & charity streamer by night, Mirvan is a man of simple tastes.
Hotkeys will be very important if you want to use a Stream Deck with Vertical. Currently, you have to set the hotkeys up in OBS, then add them as Hotkey macros in your Stream Deck software under System.
Final Thoughts
Aitum’s Vertical Plug-in for OBS is a very useful and versatile tool in a streamer’s arsenal if they want to expand their content into sites like Instagram or TikTok with minimal video editing. There is a very dedicated and responsive dev team in their Discord. As always, if you have questions you can reach out in our StreamerSquare Discord with any questions or concerns!
About the Author
MirvansMusings
Mirvan is a writer, certified tech wizard and jack-of-all-trades! He is a father of 3 by day, then a variety & charity streamer by night. Mirvan is a man of simple tastes who loves TCGs, RPGs, and MMOs.


